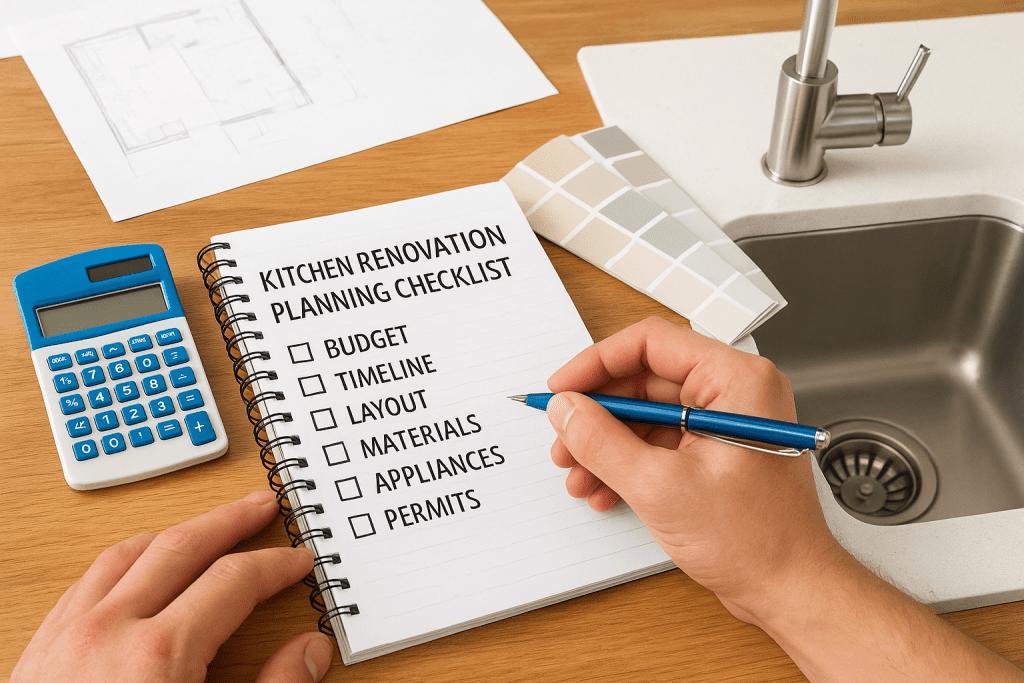
Kitchen Renovation Planning Checklist: Budget & Timeline
A kitchen renovation can feel overwhelming before you even pick up a tile sample. Between juggling budgets, choosing materials, coordinating trades, and keeping your household running, it’s easy to lose track of critical steps. That’s exactly why having a kitchen renovation planning checklist matters, it turns a complex project into a sequence of manageable, predictable decisions that keep you on track from day one. At Transformer Homes, we’ve guided homeowners across Melbourne’s Northern and Western suburbs through hundreds of kitchen remodels. One pattern we see repeatedly: the projects that run smoothly aren’t necessarily the ones with the biggest budgets, they’re the ones with the clearest plans. A solid checklist prevents costly backtracking, reduces stress, and gives you real control over your timeline and spend. This guide walks you through every stage of planning a kitchen renovation, from setting a realistic budget and locking in your design layout to selecting materials and understanding the order each task needs to happen. We’ve also included practical tips drawn from our own build process so you can approach your renovation with confidence. Whether you’re updating a tired galley kitchen in Preston or gutting a full space in Thornbury, this checklist will help you stay organised and avoid surprises. What to decide before you plan anything Before you touch your kitchen renovation planning checklist, you need to answer a handful of foundational questions. Skipping this step is the single biggest reason renovations stall or blow out midway through. Getting clarity upfront on a few key areas means every decision that follows has a solid basis, rather than being made on the run when the pressure is on. Know your non-negotiables Start by separating what you must have from what you’d simply like to have. These are your non-negotiables: the features, functions, or design outcomes you won’t compromise on. Writing these down before anything else stops them from getting lost once the excitement of picking finishes takes over. Your non-negotiables shape every downstream decision, from layout to budget allocation, so define them before you open a single product catalogue. Common non-negotiables include: Bench run length: the minimum continuous work surface your household needs Storage configuration: whether you prioritise drawers over cupboards or need a pantry Appliance placement: fixed by existing plumbing, gas, or electrical rough-in positions Natural light: whether you need to protect or add window openings Clarify who is doing what Decide early whether you’re hiring a builder to manage the full project, using a kitchen company for supply and install only, or project-managing the trades yourself. Each path carries a different level of involvement, cost structure, and risk. A builder like Transformer Homes handles coordination across cabinetmakers, electricians, plumbers, and tilers, which removes the pressure of scheduling from your plate entirely. If you plan to manage trades independently, you need to commit the time to do it properly, because delays caused by poor sequencing cost money and extend your timeline significantly. Consider these questions before you move on: Who has final sign-off on design and material decisions? What is your household’s tolerance for disruption during the build? Do you have a trusted builder, or do you still need to get quotes? Step 1. Define scope and set a realistic budget Scope and budget are inseparable decisions that shape every part of your kitchen renovation planning checklist. Define both clearly before you speak to a single tradesperson, and you’ll have a far stronger basis for getting accurate quotes and avoiding costly changes mid-build. Define your renovation scope Before you price anything, you need to specify exactly what the renovation covers. A full gut involves removing walls, relocating plumbing, and rewiring circuits, while a cosmetic refresh might only touch cabinet doors and benchtops. Writing your scope down in plain terms prevents misunderstandings with your builder and gives tradespeople a clear basis for quoting. Use this simple scope template to get started: Scope area Included? Notes Cabinet replacement Yes / No Full, partial, or doors only Benchtop replacement Yes / No Material preference Plumbing relocation Yes / No Sink, dishwasher Electrical upgrade Yes / No Circuits, rangehood Flooring Yes / No Area in m² Splashback Yes / No Tile, glass, or stone Set a realistic budget Once your scope is confirmed, allocate a budget with a built-in contingency. A figure that covers only best-case scenarios will fail the moment an unexpected issue surfaces, and that happens on the majority of renovations. Add 15 to 20 per cent on top of your base cost estimate as a financial buffer. Never treat your contingency as spending money; it exists specifically to absorb genuine surprises. Keeping contingency separate from your main allocation also makes it easier to monitor whether your project is tracking on cost as the work progresses. Step 2. Lock in your layout and key design choices Your kitchen layout determines how functional the finished space will be, so locking it in before you finalise anything else in your kitchen renovation planning checklist is essential. Changes to layout after cabinetry is ordered or plumbing is roughed in carry real costs, so treat this step as a firm decision point. Choose a layout that matches how you cook The most common layouts each suit different room shapes and household sizes. Picking the right layout for your space prevents a design that looks good on paper but frustrates you in daily use. Layout Best suited for Key trade-off Galley Narrow rooms, single cook Limited turning space L-shape Corner spaces, open-plan Wasted corner storage U-shape Larger kitchens, multiple cooks Needs adequate floor area Island Open-plan, social cooking Requires 900mm clearance Nail your key design decisions Once your layout is confirmed, write down every major design decision before briefing a cabinetmaker or any trades. A single written brief reduces confusion and keeps your project moving without costly revisions. Include these key decisions in your brief: Ceiling height and cornice detail Rangehood type and flue position Overhead cabinet depth and height Island or peninsula dimensions and overhang Locking in your design brief
