A bathroom renovation can go sideways fast, blown budgets, surprise plumbing issues, weeks of delays, and most of the damage happens before a single tile gets laid. The difference between a smooth project and a stressful one almost always comes down to preparation. That’s exactly why having a solid bathroom renovation checklist matters. It keeps every decision, trade, and material selection on track from day one.
At Transformer Homes, we’ve managed hundreds of bathroom renovations across Melbourne’s northern and western suburbs. We’ve seen what happens when homeowners skip steps, and we’ve built our process around making sure nothing gets missed. Whether you’re working with us or tackling the planning yourself, this guide gives you a clear, practical framework to follow.
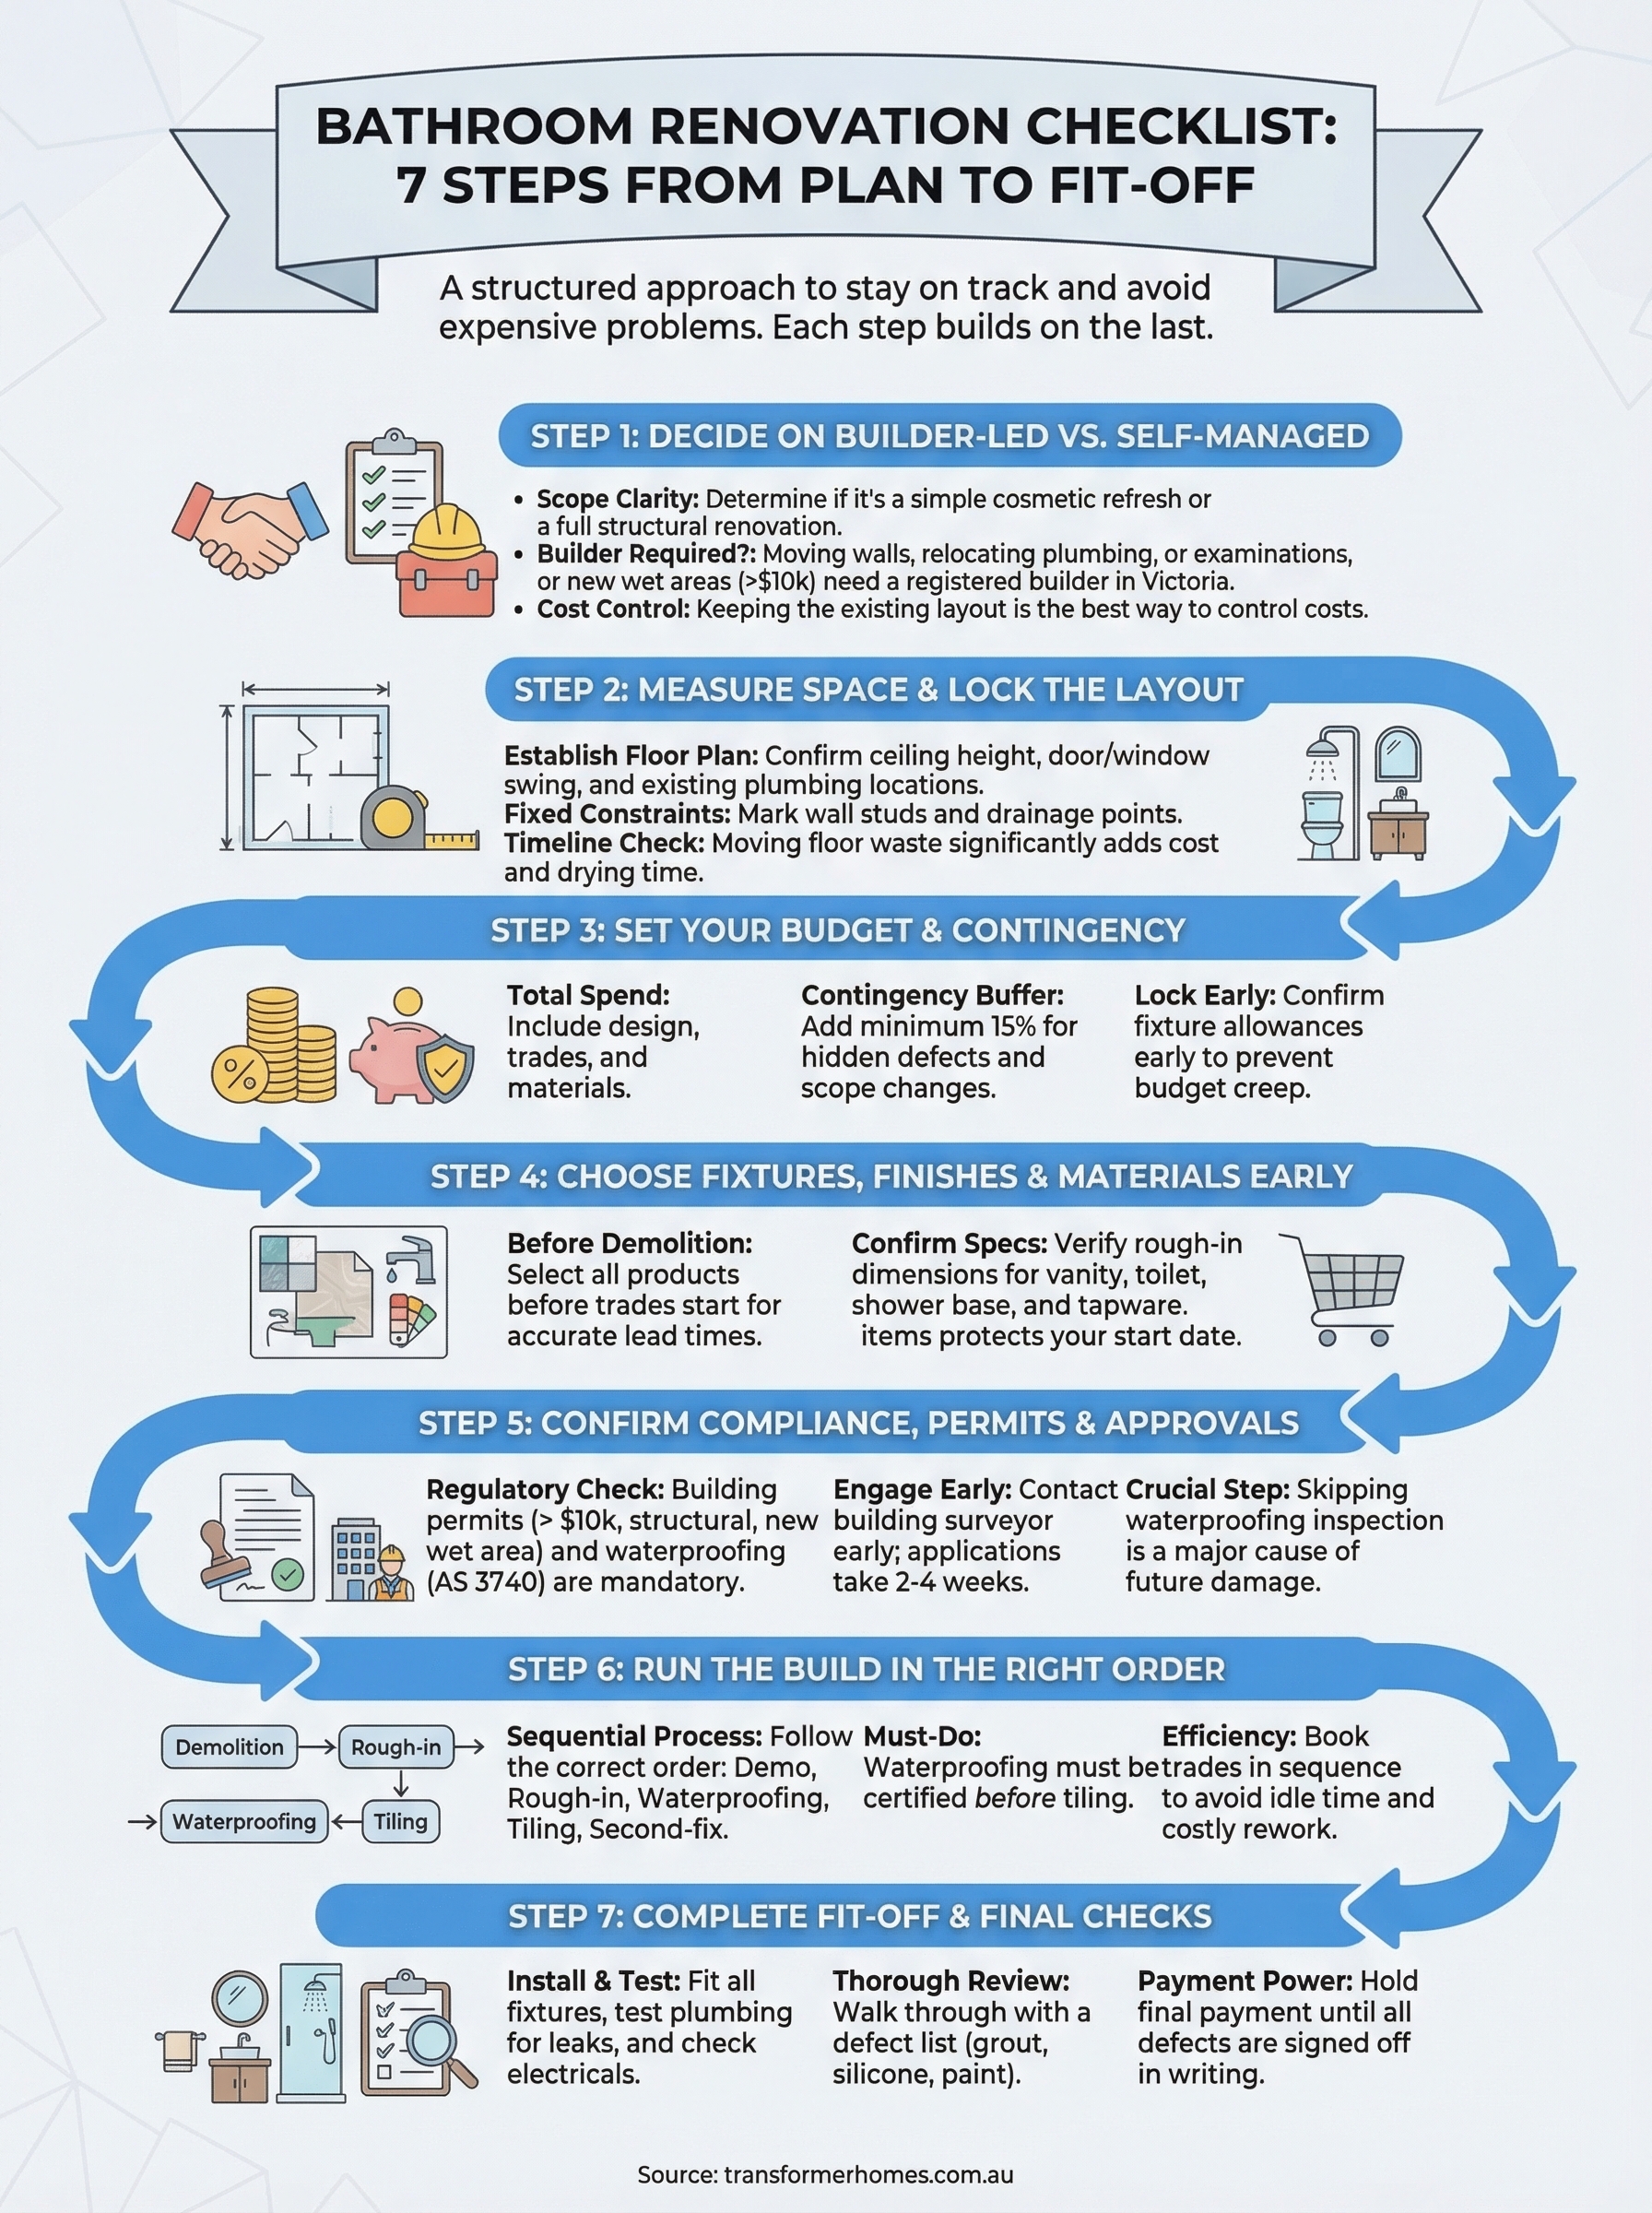
Below, we break down the seven steps that take a bathroom renovation from initial planning through to fit-off, covering budgets, design decisions, permits, trades, and the details that are easy to overlook until they become expensive problems. Each step builds on the last, so you’ll know exactly what to do and when to do it. Consider this your go-to reference for the entire project.
1. Decide if you need a builder-led renovation
The very first decision shapes everything else on your bathroom renovation checklist. Before you pick a tile or call a plumber, you need to work out whether your project is a simple cosmetic refresh or a full structural renovation, because that distinction changes who you need, what approvals apply, and what the whole thing will cost you.
What this step covers
This step is about scope clarity. A cosmetic update, swapping tapware, repainting walls, or replacing a vanity, can often be handled by individual trades you coordinate yourself. A renovation that moves walls, relocates plumbing, or creates a new wet area from scratch requires a registered builder in Victoria under the Domestic Building Contracts Act.
In Victoria, any domestic building work valued over $10,000 must be carried out under a major domestic building contract with a registered building practitioner.
Your checklist
Work through these questions before committing to any approach:
- Is your project structural? Moving walls, altering floor levels, or waterproofing a new wet area all require builder oversight.
- Will your plumbing or drainage relocate? Any change to pipe positions needs a licensed plumber and may trigger a building permit.
- What is your total estimated spend? Projects above $10,000 activate registration and contract requirements under Victorian law.
- Do you have time to manage trades yourself? Self-coordinating means you book, schedule, and troubleshoot every subcontractor directly.
Decisions that affect cost and timeline
Keeping your existing layout is the single most effective way to control cost at this stage. The moment you move a toilet, shower, or basin, you’re paying for new drainage runs, extended waterproofing, and additional labour hours. Builder-led projects carry overhead, but they reduce your coordination burden and provide statutory warranty protections under the Domestic Building Contracts Act, which matters if something goes wrong six months after completion.
Questions to ask your trades or builder
Ask these before you sign anything:
- Are you registered with the Victorian Building Authority for domestic building work?
- What contract type applies to this project, and what does it include?
- Who takes responsibility for permits and inspections?
- How do you manage scope changes once the build is underway?
2. Measure the space and lock the layout
Once you know who is managing your project, your next priority is to confirm the exact measurements and lock in your layout before anyone orders a product. Getting this wrong means fixtures that don’t fit, layouts that can’t drain correctly, and costly re-orders.
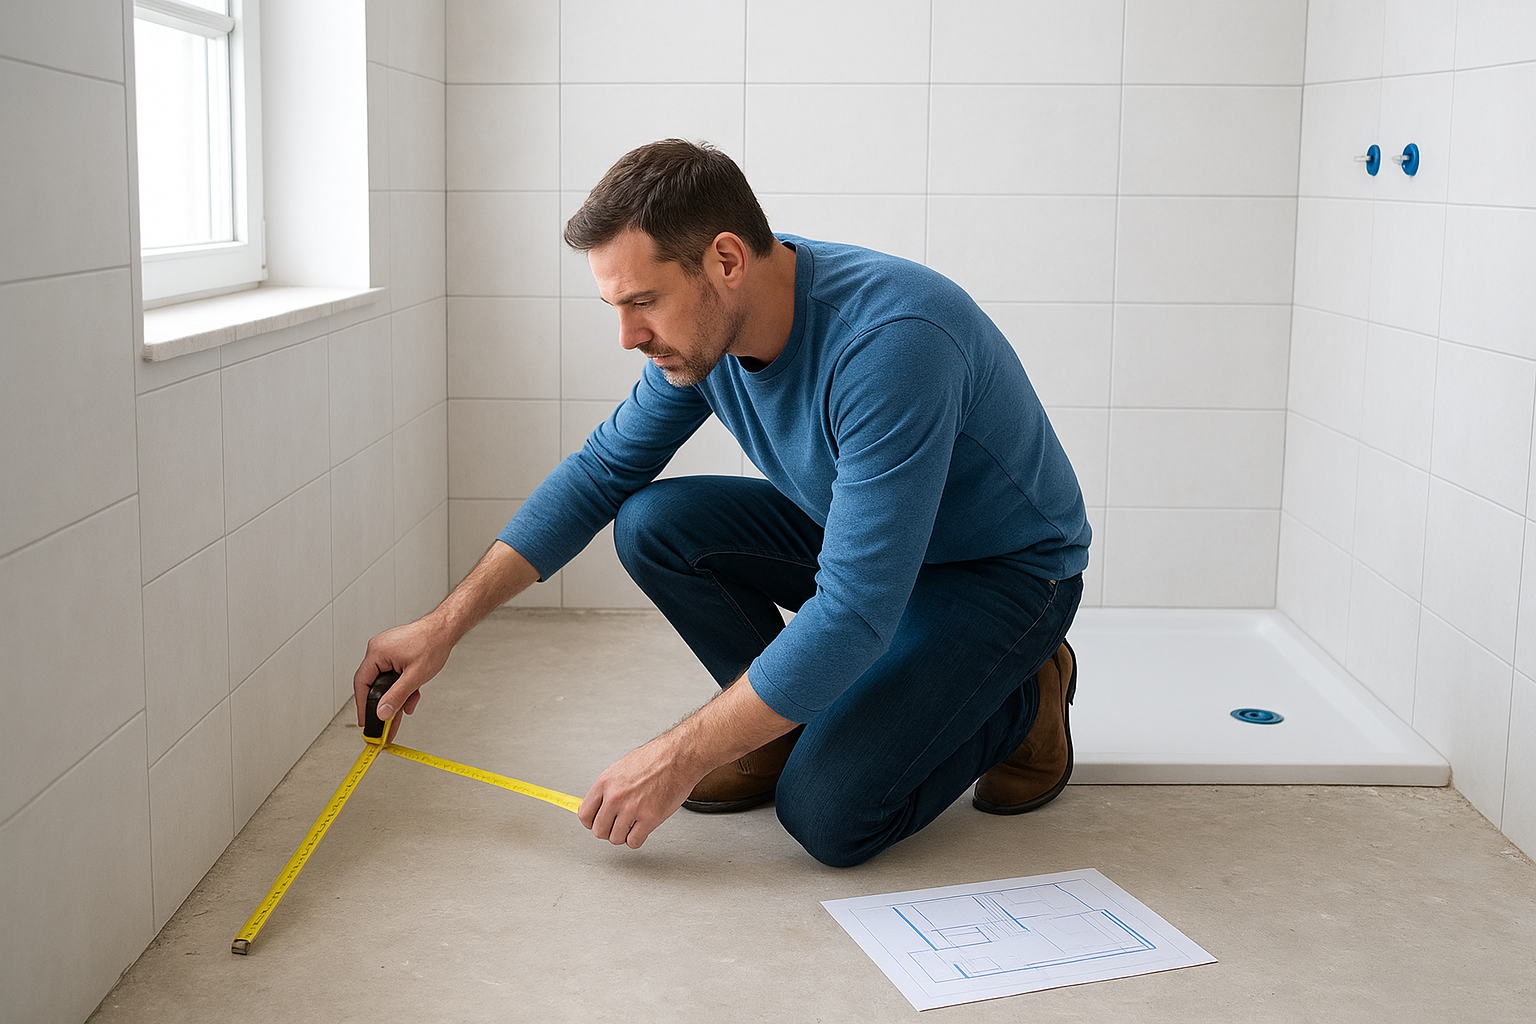
What this step covers
This step is about establishing your floor plan and identifying the fixed constraints of your space. Ceiling height, door swing, window position, and existing plumbing stack locations all determine what is physically achievable within the room.
Your checklist
Before finalising any selections on your bathroom renovation checklist, record these key measurements:
- Floor dimensions: Measure length and width at multiple points, walls are rarely perfectly square.
- Ceiling height: Confirm clearance for ceiling-mounted fixtures or recessed lighting.
- Door and window positions: Mark swing arcs and sill heights on your floor plan.
- Existing drain locations: Note the floor waste, toilet rough-in, and basin drain positions.
- Wall stud positions: Identify these before planning any wall-hung fixtures or niches.
Decisions that affect cost and timeline
Keeping your floor waste in its current position is the fastest way to protect your timeline. Moving a toilet rough-in or floor drain requires cutting concrete, extended plumbing labour, and additional drying time before any tiling can begin.
Moving a single floor waste point can add $1,500 to $3,000 to your renovation budget in Melbourne.
Questions to ask your trades or builder
Ask your plumber or builder to confirm these points before finalising your layout:
- Can the existing drainage support the new configuration without relocation?
- What is the minimum fall required to the floor waste under AS/NZS 3500?
3. Set your budget and contingency
With your layout confirmed, you need a realistic budget before committing to anything on your bathroom renovation checklist. Skipping this step is how projects stall halfway through or end up cutting corners on materials that matter.
What this step covers
This step is about setting a total spend figure and building in a contingency buffer for the unexpected costs that almost every renovation uncovers. Behind walls and under floors, problems like rotted framing, old waterproofing failures, or outdated wiring regularly surface once demolition begins.
Budget a minimum 15% contingency on top of your quoted renovation cost to cover hidden defects and scope changes.
Your checklist
Before you approve any quotes, record each cost category separately so you can track where your total budget is allocated:
- Total project budget: Confirm your maximum spend, including design fees, trades, and materials.
- Contingency reserve: Set aside at least 15% of your budget above material allowances.
- Fixture and finish allowances: Assign a dollar figure per category, tiles, tapware, vanity, and toilet suite.
- Trade costs: Get itemised quotes from each trade so you can compare like for like.
Decisions that affect cost and timeline
Locking fixture allowances early prevents the most common form of budget creep. Many homeowners underestimate tapware and tile costs, then face a shortfall once they visit a showroom.
Your payment schedule also directly affects your cashflow. Most builder-led renovations in Victoria use milestone-based payments tied to construction stages, so confirm when each payment falls before work starts.
Questions to ask your trades or builder
Ask these before you sign any contract:
- Are your quotes fixed price or subject to adjustment for hidden defects?
- What milestone payments apply, and what triggers each one?
4. Choose fixtures, finishes, and materials early
Locking in your fixtures and materials before demolition starts is one of the most practical steps on your bathroom renovation checklist. Trades cannot confirm lead times or sequence their work until they know exactly what products are being installed.
What this step covers
This step covers every product selection that your trades need to plan around, from your shower base dimensions to your tapware hole configuration. Many items carry four to eight week lead times, so late decisions push your build start date back or force your tradesperson to work around incomplete information.
Your checklist
Run through each category and confirm your selections before signing off on any quotes:
- Vanity and basin: Confirm dimensions, tap hole positions, and wall or floor mount.
- Toilet suite: Choose back-to-wall or close-coupled and confirm rough-in distance.
- Shower base or hob: Lock in size, waste position, and entry configuration.
- Tapware: Select all handles, mixers, and shower heads from the same range.
- Tiles: Confirm floor, wall, and feature tile SKUs with quantities.
Decisions that affect cost and timeline
Selecting fixtures from the same supplier where possible reduces the risk of mismatched finishes and simplifies returns if something arrives damaged. Choosing locally stocked products over imported special-orders is the fastest way to protect your start date.
A single long-lead fixture can delay your entire build by two to four weeks.
Questions to ask your trades or builder
Your plumber and tiler both need product specifications confirmed before they can accurately price the job:
- What rough-in dimensions do you need confirmed before ordering?
- Which products require on-site delivery before work begins?
5. Confirm compliance, permits, and approvals
Permits and compliance checks are often the most overlooked part of any bathroom renovation checklist, yet they carry some of the heaviest consequences when skipped. Failing to obtain the correct approvals in Victoria can result in fines, forced demolition, or an inability to sell your property without expensive rectification work.
What this step covers
This step confirms which regulatory requirements apply to your specific scope of work. Waterproofing installations must comply with AS 3740, and any domestic building work valued over $10,000 requires a building permit issued by a registered building surveyor in Victoria.
Your checklist
Work through each item before construction begins:
- Building permit: Required for structural changes, new wet areas, or projects over $10,000.
- Waterproofing compliance: A licensed waterproofer must apply and certify the membrane to AS 3740.
- Plumbing permit: Required for any new or relocated drainage, issued through your licensed plumber.
- Owner-builder registration: If you are self-managing, confirm whether owner-builder registration applies to your project.
Decisions that affect cost and timeline
Engaging your building surveyor early keeps approvals from becoming a bottleneck once your trades are booked. Permit applications in Victoria typically take two to four weeks to process, and starting work without one invalidates your statutory warranty protections.
Skipping a waterproofing inspection is the most common cause of long-term water damage claims in bathroom renovations.
Questions to ask your trades or builder
Confirm these points before any work starts on site:
- Who lodges the building permit application, and is that fee included in your quote?
- Does your waterproofer provide a compliance certificate on completion?
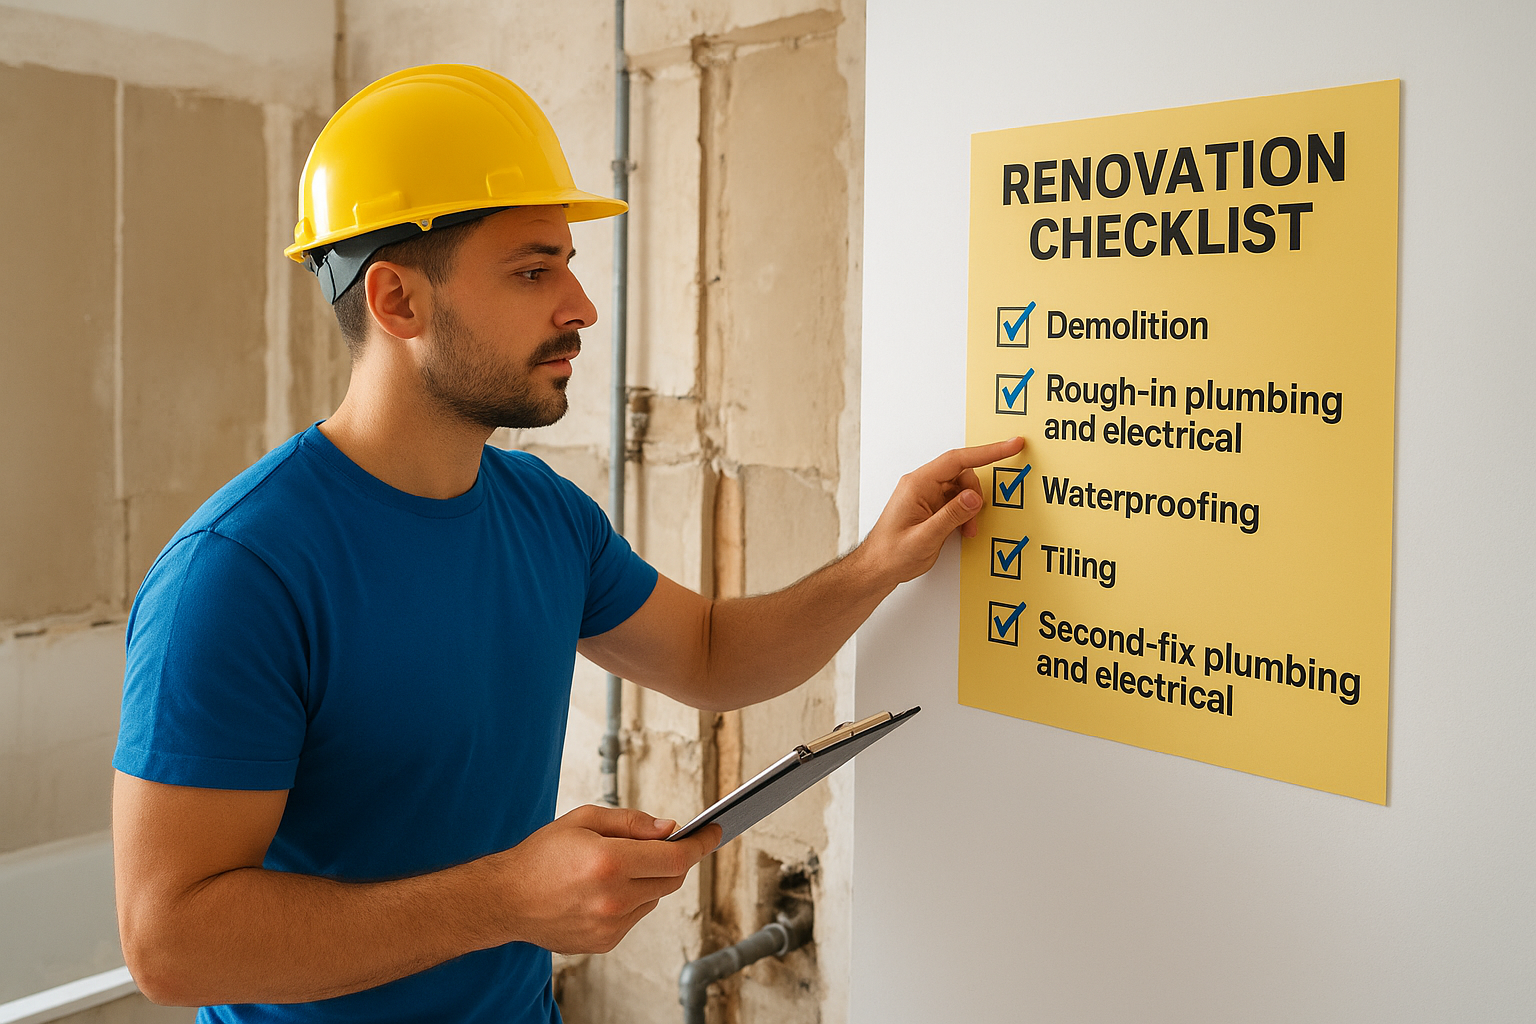
6. Run the build in the right order
Sequencing your renovation correctly is what separates a clean, efficient build from a project full of rework and waiting. Every trade depends on the one before finishing their work to a specific standard, and running them out of order creates problems that are costly to fix after the fact.
What this step covers
This step outlines the correct construction sequence for a bathroom renovation, from demolition through to waterproofing and tiling. Skipping stages or overlapping trades is one of the most common causes of defect callbacks and timeline blowouts on residential projects.
Your checklist
Work through these stages in order on your bathroom renovation checklist:
- Demolition: Strip out existing fixtures, tiles, and any framing that needs replacing.
- Rough-in plumbing and electrical: Relocate or extend services before walls are closed.
- Waterproofing: Apply and inspect the membrane before any tiles go down.
- Tiling: Complete floor and wall tiling only after the waterproofing certificate is issued.
- Second-fix plumbing and electrical: Install fixtures, switches, and outlets once tiling is complete.
Waterproofing must be inspected and certified before tiling begins, or your installation will not comply with AS 3740.
Decisions that affect cost and timeline
Booking trades in sequence rather than all at once prevents idle time on site. Your builder or project manager should confirm each trade’s start date only after the preceding stage passes its inspection, not before.
Questions to ask your trades or builder
Clarify these points before work begins so nothing stalls mid-build:
- What sign-off process applies between each construction stage?
- Who confirms the waterproofing inspection is complete before the tiler starts?
7. Complete fit-off and final checks
Fit-off is where every fixture gets installed, tested, and signed off before you use the room. This is also the point where your bathroom renovation checklist gets its final review, confirming that everything ordered, approved, and built to standard has been delivered.
What this step covers
This step covers the installation of all fixtures and the inspections needed to close out the project. Tapware, mirrors, towel rails, and shower screens are fitted once tiling and painting are complete, and each trade returns to finish their work in sequence.
Your checklist
Before you accept the finished space, work through every installation category to confirm nothing has been missed. A thorough walkthrough at this stage prevents disputes after handover.
- Plumbing fixtures: Test every tap, showerhead, and toilet for leaks and correct pressure.
- Electrical fittings: Confirm lighting, exhaust fans, and heated towel rails all operate correctly.
- Grout and silicone: Check all joints are sealed with no gaps around the shower screen or bath.
- Defect list: Document any items needing rectification before releasing final payment.
Decisions that affect cost and timeline
Holding your final payment until all defects are resolved is your strongest lever at this stage. Releasing funds before the defect list is cleared reduces your builder’s incentive to return.
Never release your final payment until you have a completed defect list signed off in writing.
Questions to ask your trades or builder
Confirm these points at handover before you sign off the project. Asking now protects your warranty entitlements going forward.
- Who handles warranty callbacks on plumbing and electrical fittings?
- What is the defects liability period under your contract?
Next steps
Working through this bathroom renovation checklist step by step gives you the clearest possible picture of what your project involves before anyone picks up a tool. Each stage builds on the last, so the decisions you make early, on layout, budget, and fixture selections, directly shape how smoothly the build runs and what the finished result looks like.
Most renovation problems are planning problems in disguise. When you lock in your scope, confirm your compliance obligations, and sequence your trades correctly, you remove the conditions that cause delays and cost blowouts. That preparation is what separates a renovation you’re proud of from one you’re still finishing six months later.
If you’re planning a bathroom renovation in Melbourne’s northern or western suburbs and want a builder who manages the full process, get in touch with the team at Transformer Homes to talk through your project.
