A bathroom renovation can add real value to your home, but it can also drain your budget and patience if you go in without a plan. Whether you’re updating a tired ensuite or gutting a family bathroom in your Melbourne home, having a solid bathroom renovation planning guide makes the difference between a project that runs smoothly and one that spirals into costly surprises and delays.
The truth is, most renovation headaches start before a single tile gets removed. They start with unclear budgets, skipped steps, and unrealistic timelines. Knowing what to expect, and in what order, gives you control over the process instead of the other way around. That’s something we see firsthand at Transformer Homes, where we help homeowners across Melbourne’s northern and western suburbs navigate renovations with clarity from day one.
In this guide, we break down everything you need to know: how to set a realistic budget, the correct sequence of construction tasks, expected timelines, and a practical checklist to keep your project on track from design through to completion. Let’s get into it.
What to decide before you start
Before you contact a builder, pick tiles, or look up fixtures online, you need to make several foundational decisions that will shape every part of the project. Skipping this stage is one of the most common reasons renovations go over budget or stall mid-construction. Think of this section as your pre-renovation checklist: the decisions you lock in here will inform your budget, your timeline, and how smoothly the build runs from the first demolition day through to the final coat of paint.
Know what you need versus what you want
Most people start a bathroom renovation with a wish list, and there’s nothing wrong with that. The problem is when wants get treated as needs right from the start. A heated floor is a want. Fixing a leak behind the wall is a need. A freestanding bath is a want. Replacing cracked waterproofing is a need. Before you sit down with a designer or builder, write two separate lists: one for non-negotiable functional requirements and one for upgrades and aesthetic preferences.
Getting clear on needs versus wants early on stops your budget from blowing out before the real work has even started.
Here’s a simple template to get you started:
| Category | Need (must fix or include) | Want (would love but flexible) |
|---|---|---|
| Waterproofing | Yes, full resheet required | N/A |
| Shower | Functional, code-compliant | Frameless screen, rain head |
| Vanity | Replace damaged cabinet | Specific brand or colour |
| Toilet | Retain existing if functional | Wall-hung upgrade |
| Flooring | Non-slip compliant tiles | Specific stone look |
| Lighting | Replace faulty fittings | Backlit mirror, dimmers |
Fill this in before your first meeting with a builder, and you’ll have a much more productive conversation.
Understand your bathroom’s physical constraints
Your bathroom’s existing layout and condition will directly affect your renovation costs and options. Moving a toilet or relocating drainage requires a licensed plumber and often involves cutting into a concrete slab, which adds significant cost and time. If you want to keep costs down, working within the existing wet area footprint is almost always the more practical choice.
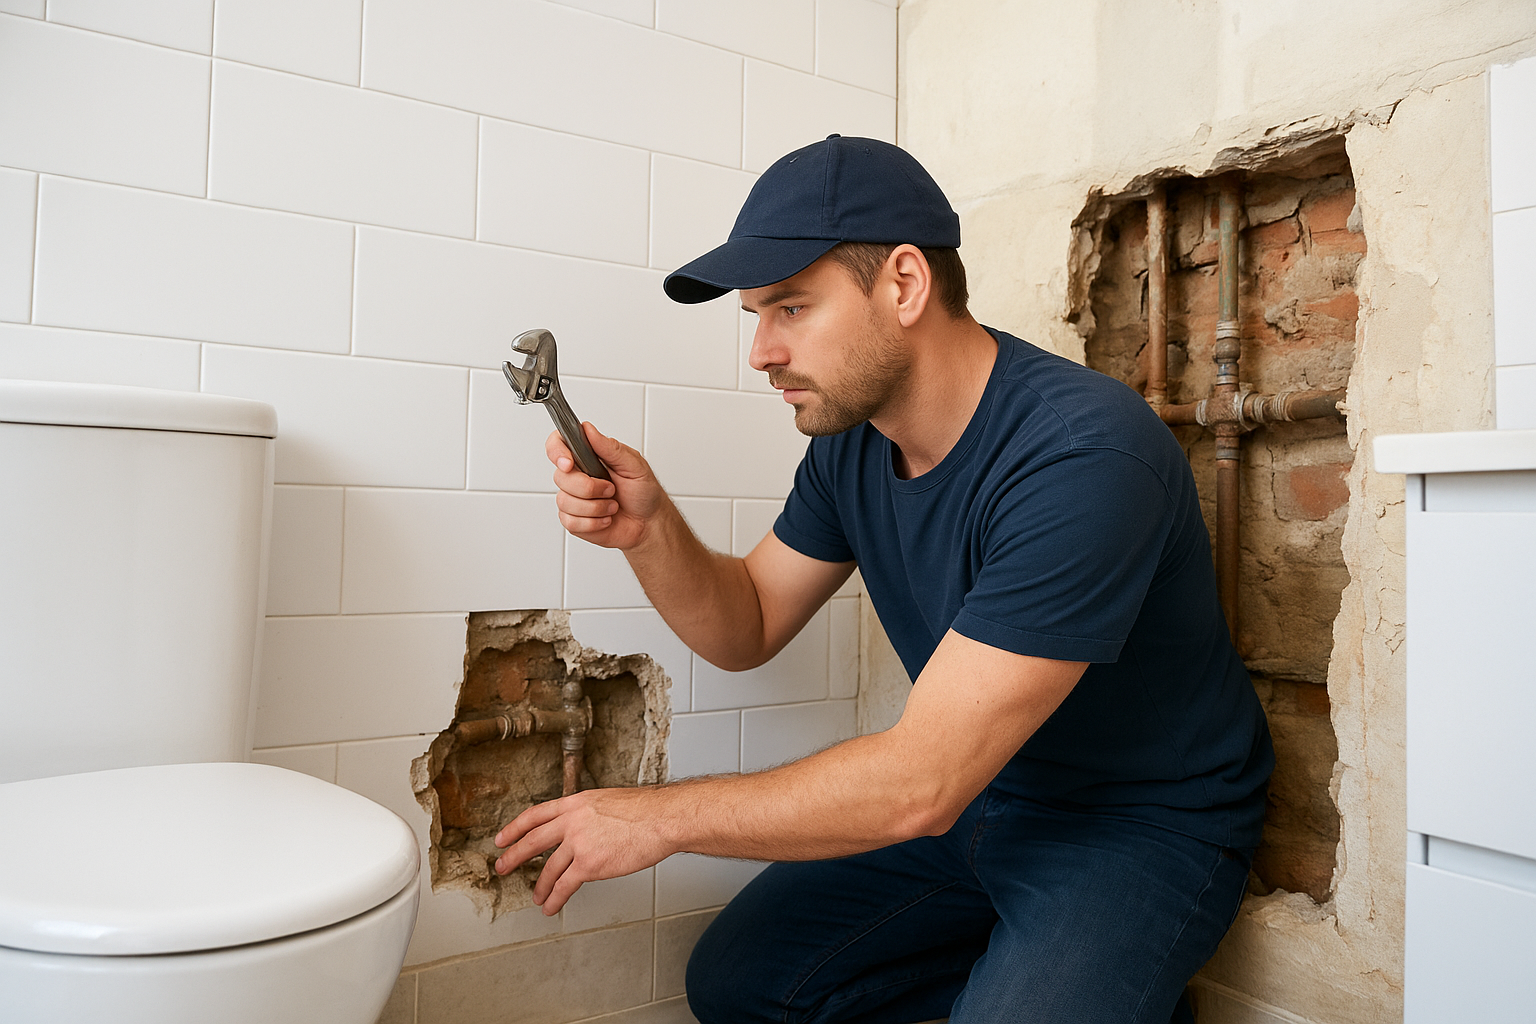
Walk through your bathroom and note what you’re working with. Are the walls tiled or lined? Is there access to plumbing from a nearby cupboard or adjoining room? How old is the waterproofing membrane? In older Melbourne homes, particularly in suburbs like Preston or Northcote, it’s common to find outdated plumbing and degraded waterproofing that needs addressing before any cosmetic work begins. A pre-renovation inspection by a licensed plumber and tiler will flag these issues before they become mid-project surprises.
Decide who manages the project
One of the biggest decisions in any bathroom renovation planning guide is who takes the lead on coordination. You have three main options: manage the trades yourself, hire a dedicated project manager, or work with a builder who handles the full scope under one contract.
Self-managing means you source and schedule your own plumber, tiler, electrician, and waterproofer independently. It can save money on paper, but trade scheduling and sequencing is genuinely complex. If one trade runs late, every trade after them gets pushed back. Gaps in scheduling can mean your bathroom sits half-demolished for weeks.
Working with a builder like Transformer Homes means one point of contact handles the coordination, compliance checks, and quality control across all trades. For most homeowners renovating in Melbourne’s northern and western suburbs, this approach reduces stress and protects against the delays that come from trying to juggle multiple contractors at once. Decide early which model suits your capacity and experience, because it will shape how you approach budgeting and planning in the steps ahead.
Step 1. Set your budget and scope
Budget is where most bathroom renovations fall apart. People pick a number, often based on a rough figure they’ve seen online, then discover mid-project that their scope was far bigger than their budget allowed. Getting this step right means being honest about what you can spend and matching your scope to that number before you commit to anything.
Work out what a bathroom renovation actually costs
In Melbourne, bathroom renovation costs vary significantly depending on the size of the space, the condition of existing plumbing and waterproofing, and the quality of fixtures and finishes you choose. As a starting point, a basic bathroom update (new fixtures, tiling, and fittings within the existing layout) typically starts around $10,000 to $15,000. A mid-range renovation with quality products and some layout changes sits between $15,000 and $30,000. A full, high-end renovation with premium fixtures and structural changes can exceed $40,000.
Your budget should always include a contingency of at least 10 to 15% for unexpected issues like deteriorated waterproofing, outdated plumbing, or structural surprises behind the walls.
| Renovation Level | Typical Cost Range (AUD) | What’s Included |
|---|---|---|
| Basic update | $10,000 – $15,000 | Like-for-like fixtures, retiling, no layout changes |
| Mid-range | $15,000 – $30,000 | Quality fittings, layout options, full resheet |
| High-end | $30,000 – $50,000+ | Premium fixtures, structural changes, custom finishes |
Define your scope before you spend anything
Once you have a realistic cost range in mind, define the exact scope of your renovation in writing before you approach any builder or supplier. Scope creep, where the project gradually expands beyond the original plan, is one of the most reliable ways to blow your budget without realising it. If you decide to add a heated towel rail or upgrade the mirror after signing a contract, expect those additions to come with a price adjustment.
Before any conversations begin, use this simple scope template to lock in your intentions and ensure every quote you receive is based on the same project parameters:
- Bathroom size: (e.g. 3m x 2m)
- Layout changes: Yes / No (relocating plumbing, moving walls)
- Fixtures to replace: Vanity, toilet, shower, bath, tapware
- Tiling scope: Floor only / floor and walls / full resheet
- Electrical work: New lighting, exhaust fan, heated floor
- Waterproofing: Partial or full replacement required
- Target completion date: (gives your builder a scheduling reference)
Taking 30 minutes to fill this in means your bathroom renovation planning guide stays grounded in your actual situation, and every quote you receive reflects the same scope.
Step 2. Lock in design, products and timeline
Once your budget and scope are confirmed, the next step is to finalise your design choices and build a realistic project timeline. This is where many homeowners lose momentum. They assume they can make design decisions on the fly, only to find that delayed product orders and late selections hold up trades and push out their completion date by weeks.
Finalise your design before ordering anything
You need a complete, confirmed design before you order a single product. That means your tile selection, fixture specifications, vanity dimensions, and tapware finishes all locked in and documented before construction begins. Changes made after tiling or plumbing starts are expensive and sometimes impossible to reverse without rework.
Locking in your full design before the build starts is the single most effective way to avoid costly mid-project variations.
Work through your design in this order to avoid going back and forward:
- Set your layout (shower position, vanity placement, toilet location)
- Choose your tiles and confirm grout colour
- Select your vanity and confirm rough-in dimensions with your plumber
- Choose tapware and fixtures (shower head, bath filler if applicable, basin mixer)
- Confirm electrical requirements (exhaust fan location, lighting positions, heated floor thermostat)
- Review and sign off with your builder before any orders are placed
Select products and lock in lead times
Once you’ve finalised your design, place your product orders immediately. Tiles, vanities, and tapware can have lead times of two to eight weeks depending on the supplier and whether items are in stock. If your builder is ready to tile and your tiles haven’t arrived, the whole schedule stalls.
Use this simple product tracker to manage your orders:
| Product | Supplier | Order Date | Expected Delivery | Confirmed? |
|---|---|---|---|---|
| Floor tiles | TBC | TBC | TBC | No |
| Wall tiles | TBC | TBC | TBC | No |
| Vanity | TBC | TBC | TBC | No |
| Tapware | TBC | TBC | TBC | No |
| Shower screen | TBC | TBC | TBC | No |
| Toilet suite | TBC | TBC | TBC | No |
Build a realistic timeline
A standard mid-range bathroom renovation in Melbourne typically takes three to five weeks once construction starts. That assumes all products are on site before demolition begins and trades are booked in the correct sequence. Your bathroom renovation planning guide should include a week-by-week schedule that maps each trade to the right stage of the build, which the next step covers in detail.
Step 3. Plan compliance, trades and site setup
Compliance, trades scheduling, and site preparation are the three elements most homeowners underestimate before construction begins. Getting any one of them wrong doesn’t just delay your project: it can result in failed inspections, rework costs, or avoidable disputes. Handle these items before demolition day, not during it, and you’ll give your renovation the strongest possible start.
Understand what permits and compliance you need
In Victoria, bathroom renovations that involve structural changes, new wet area waterproofing, or significant electrical work can require permits and must be carried out by licensed tradespeople. A basic like-for-like update generally doesn’t need a building permit, but any work that moves walls, alters drainage, or changes the wet area footprint may require you to lodge one with your local council or a private building surveyor.
Skipping permits isn’t just a compliance risk: it can create serious problems when you sell, refinance, or make an insurance claim.
For waterproofing specifically, the work must comply with AS 3740, the Australian Standard for Waterproofing of Domestic Wet Areas, and must be carried out and inspected by a licensed waterproofer before tiling starts. Your builder should advise you on exactly which approvals apply to your scope before any work begins.
Book your trades in the right order
Getting trades booked and sequenced correctly is one of the more practical elements of any bathroom renovation planning guide. Each trade depends on the previous one finishing correctly, so late bookings or scheduling gaps can add days or even weeks to your overall timeline.
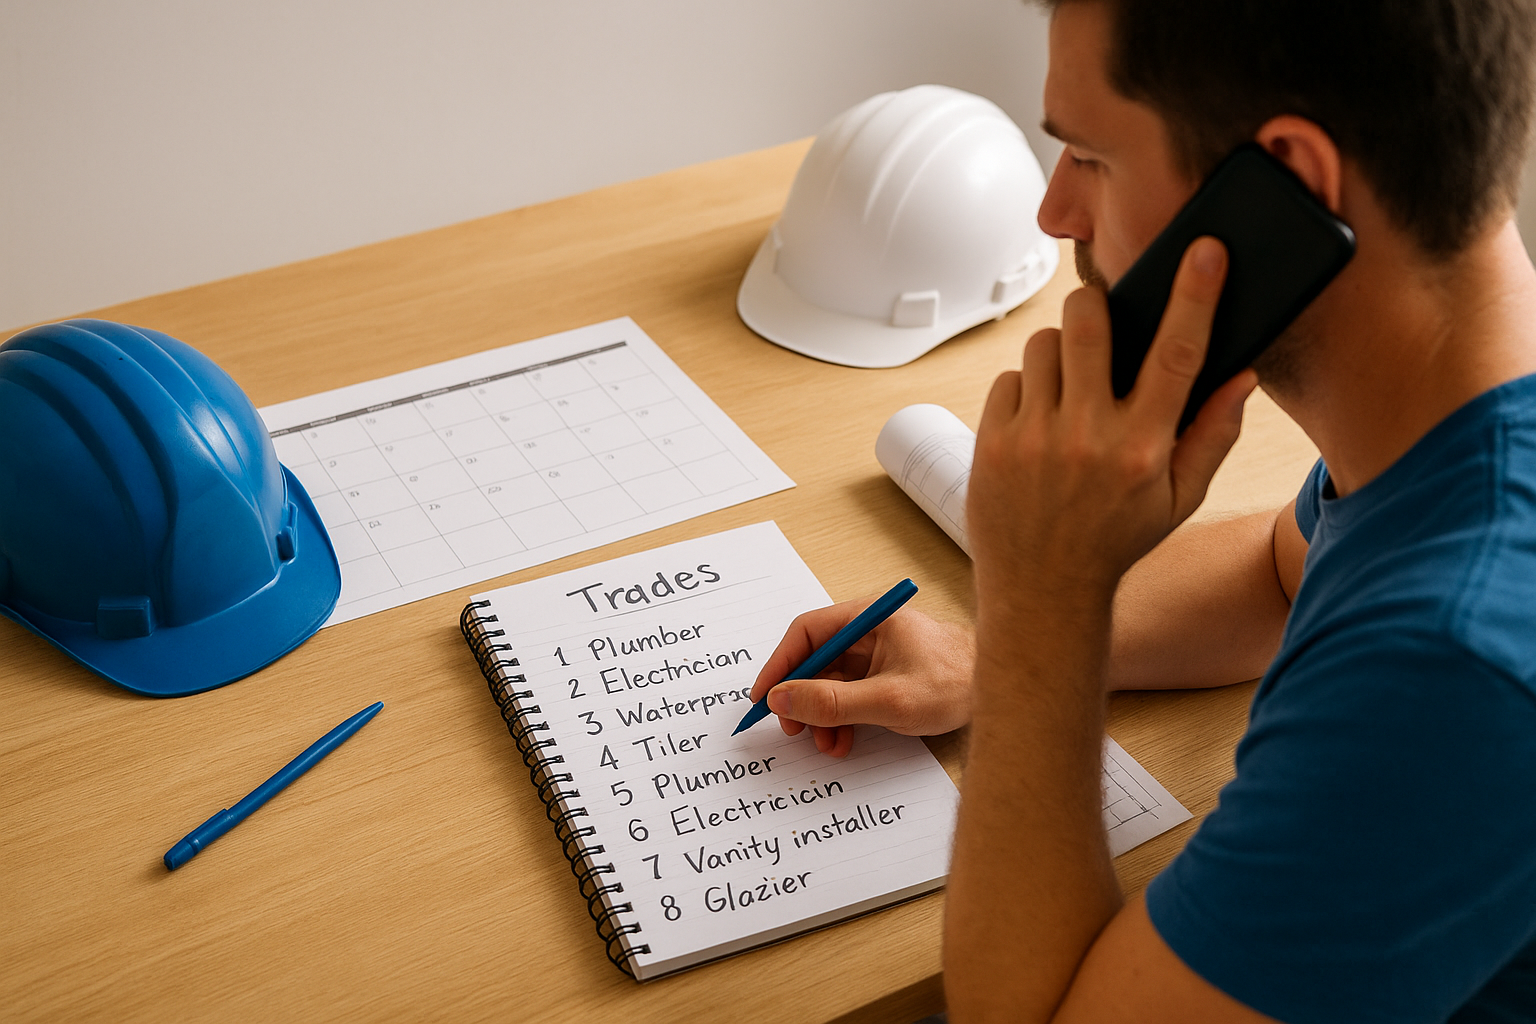
Book your trades in this order, as early as possible:
- Plumber (rough-in and drainage before walls are lined)
- Electrician (rough-in for lighting, exhaust fan, and heated floor)
- Waterproofer (after lining, before any tiling)
- Tiler (after waterproofing inspection is signed off)
- Plumber (second fix: fixtures once tiling is complete)
- Electrician (second fix: lights, exhaust fan, thermostat)
- Vanity installer (once tiling is complete)
- Glazier (shower screen, measured and fitted last)
Confirm each trade’s availability before you lock in a construction start date, not after. Trades across Melbourne’s northern and western suburbs book out weeks in advance, particularly during busy periods.
Prepare the site before work begins
Before demolition day, protect the rest of your home from dust and debris by sealing the bathroom doorway with a dust barrier and clearing the path from your entrance to the bathroom of furniture and obstacles. Confirm where your skip bin or waste removal will be positioned, and notify your neighbours of the expected noise and disruption period, especially if you’re in a terrace or semi-detached property. Sorting this before day one removes friction and keeps your build schedule running without interruption.
Step 4. Follow the correct build sequence
The build sequence is where careful planning meets actual construction. Even with a confirmed budget, locked-in products, and pre-booked trades, a misstep in the order of work can force rework, delay the entire project, or create compliance issues that fail inspection. Understanding the correct sequence is one of the most actionable parts of any bathroom renovation planning guide, and it’s the area where working with an experienced builder pays the clearest dividend.
Why the sequence can’t be flexible
Every stage of a bathroom renovation depends on the stage before it being completed correctly. Waterproofing must be applied and inspected before any tile goes down, plumbing rough-in must be finished before walls are lined, and the shower screen can’t be measured until tiling is complete and grout has set. Cutting corners on the sequence doesn’t save time; it creates rework that costs significantly more than the shortcut was worth.
Allowing any trade to start before the preceding stage is signed off is one of the fastest ways to fail a waterproofing or building inspection.
The correct build sequence, stage by stage
Use this week-by-week schedule as a reference for a standard mid-range bathroom renovation. It assumes all products are on site before demolition begins and that all trades have been pre-booked in the correct order before the project starts.
| Week | Stage | Key Tasks |
|---|---|---|
| Week 1 | Demolition and rough-in | Strip existing finishes, plumber rough-in, electrician rough-in |
| Week 2 | Lining and waterproofing | Install wall substrate, apply membrane, book inspection |
| Week 3 | Tiling | Floor and wall tiling, grouting, allow full cure time |
| Week 4 | Second fix trades | Plumber fits fixtures, electrician installs fittings, vanity installed |
| Week 5 | Finishing | Shower screen fitted, silicone applied, final clean, snagging |
Each stage carries a hard dependency on the one before it, so treat this schedule as a fixed sequence rather than a loose guide. If your waterproofer runs one day late, your tiler’s booking shifts, and the knock-on effect compounds right through to your completion date.
Snagging and final sign-off
Before you accept the finished renovation, walk through the entire bathroom with your builder and check every surface, fitting, and junction. Look at grout lines, silicone beads around the shower and bath, fixture alignment, and whether all doors and drawers operate correctly. Document any defects or outstanding items in writing and confirm a rectification date before releasing final payment. This protects you and gives your builder a clear list to close out.

Ready to start your renovation plan
A well-structured bathroom renovation planning guide does one thing above everything else: it removes the guesswork before it has a chance to cost you money. You now have the decisions to make upfront, a realistic budget framework, a confirmed design process, compliance requirements, trade sequencing, and the correct build order from demolition through to final sign-off. Each step in this guide builds directly on the one before it, so work through them in order rather than skipping ahead.
The difference between a renovation that runs smoothly and one that drags for months usually comes down to how well the groundwork was laid before construction started. If you’re planning a bathroom renovation in Melbourne’s northern or western suburbs and want a builder who manages the full process from planning to completion, talk to the team at Transformer Homes to get your project moving in the right direction.
