Extending your home is one of the smartest ways to add space and value to your property, but only if you get the planning right. Knowing how to plan a home extension properly can mean the difference between a smooth build and a costly mess. From council permits to budget blowouts, there’s a lot that can go sideways if you skip steps or rush decisions. That’s why having a clear process matters before a single wall gets touched.
At Transformer Homes, we’ve helped homeowners across Melbourne’s Northern and Western suburbs plan and build extensions that actually work, for their families, their blocks, and their budgets. We’ve seen what goes wrong when planning falls short, and we know what it takes to get it right. This guide walks you through the full process, step by step: from your initial design and budget through to council approvals, hiring the right builder, and preparing for construction day.
Whether you’re adding a second storey in Northcote or pushing out the back of your home in Preston, this is your practical roadmap for planning a home extension in Melbourne. No guesswork, no fluff, just the steps you need to follow to keep your project on track from start to finish.
What you need before you start in Melbourne
Before you dive into designs and builder quotes, you need to get some groundwork done. Knowing how to plan a home extension properly starts with understanding what applies to your specific property in Melbourne, because the rules can vary significantly from one suburb to the next. Getting this baseline information right will save you time and money before you commit to anything.
Know your property details
Your property title and zoning will shape almost everything about your extension. You can check your Certificate of Title through Land Use Victoria to confirm boundaries, easements, and any registered restrictions. You should also look up your property’s planning zone and overlays through your local council’s planning portal or the Victorian Planning Authority’s online mapping tools. Common overlays in Melbourne’s established suburbs include Heritage Overlays, Neighbourhood Character Overlays, and Vegetation Protection Overlays, all of which can limit what you build or require extra approvals.
Pull your Section 32 if you’re a recent buyer, as it often contains overlay and restriction information that directly affects what you can build.
Here’s a quick checklist of what to gather before your first builder conversation:
- Certificate of Title (for boundaries and easements)
- Planning zone and overlays (via your council or planning portal)
- Existing dwelling footprint and setbacks
- Sewer and drainage plans (from your water authority)
- Any existing building permits or approvals on the property
Understand Melbourne’s council landscape
Melbourne is divided into 31 local government areas, and each one has its own planning scheme with specific rules around setbacks, height limits, site coverage, and car parking. Your council’s planning scheme determines whether your extension needs a planning permit or can proceed under a building permit alone. In the Northern and Western suburbs, councils like Darebin, Merri-bek, and Brimbank each have distinct requirements that an experienced local builder will already know well.
Spending time reviewing your council’s residential design guidelines before you start will help you set realistic expectations for your project scope. Some councils also run free pre-application advice sessions where a planner walks through your site’s constraints with you. Taking advantage of these sessions early on can clarify what’s possible before you spend money on detailed drawings.
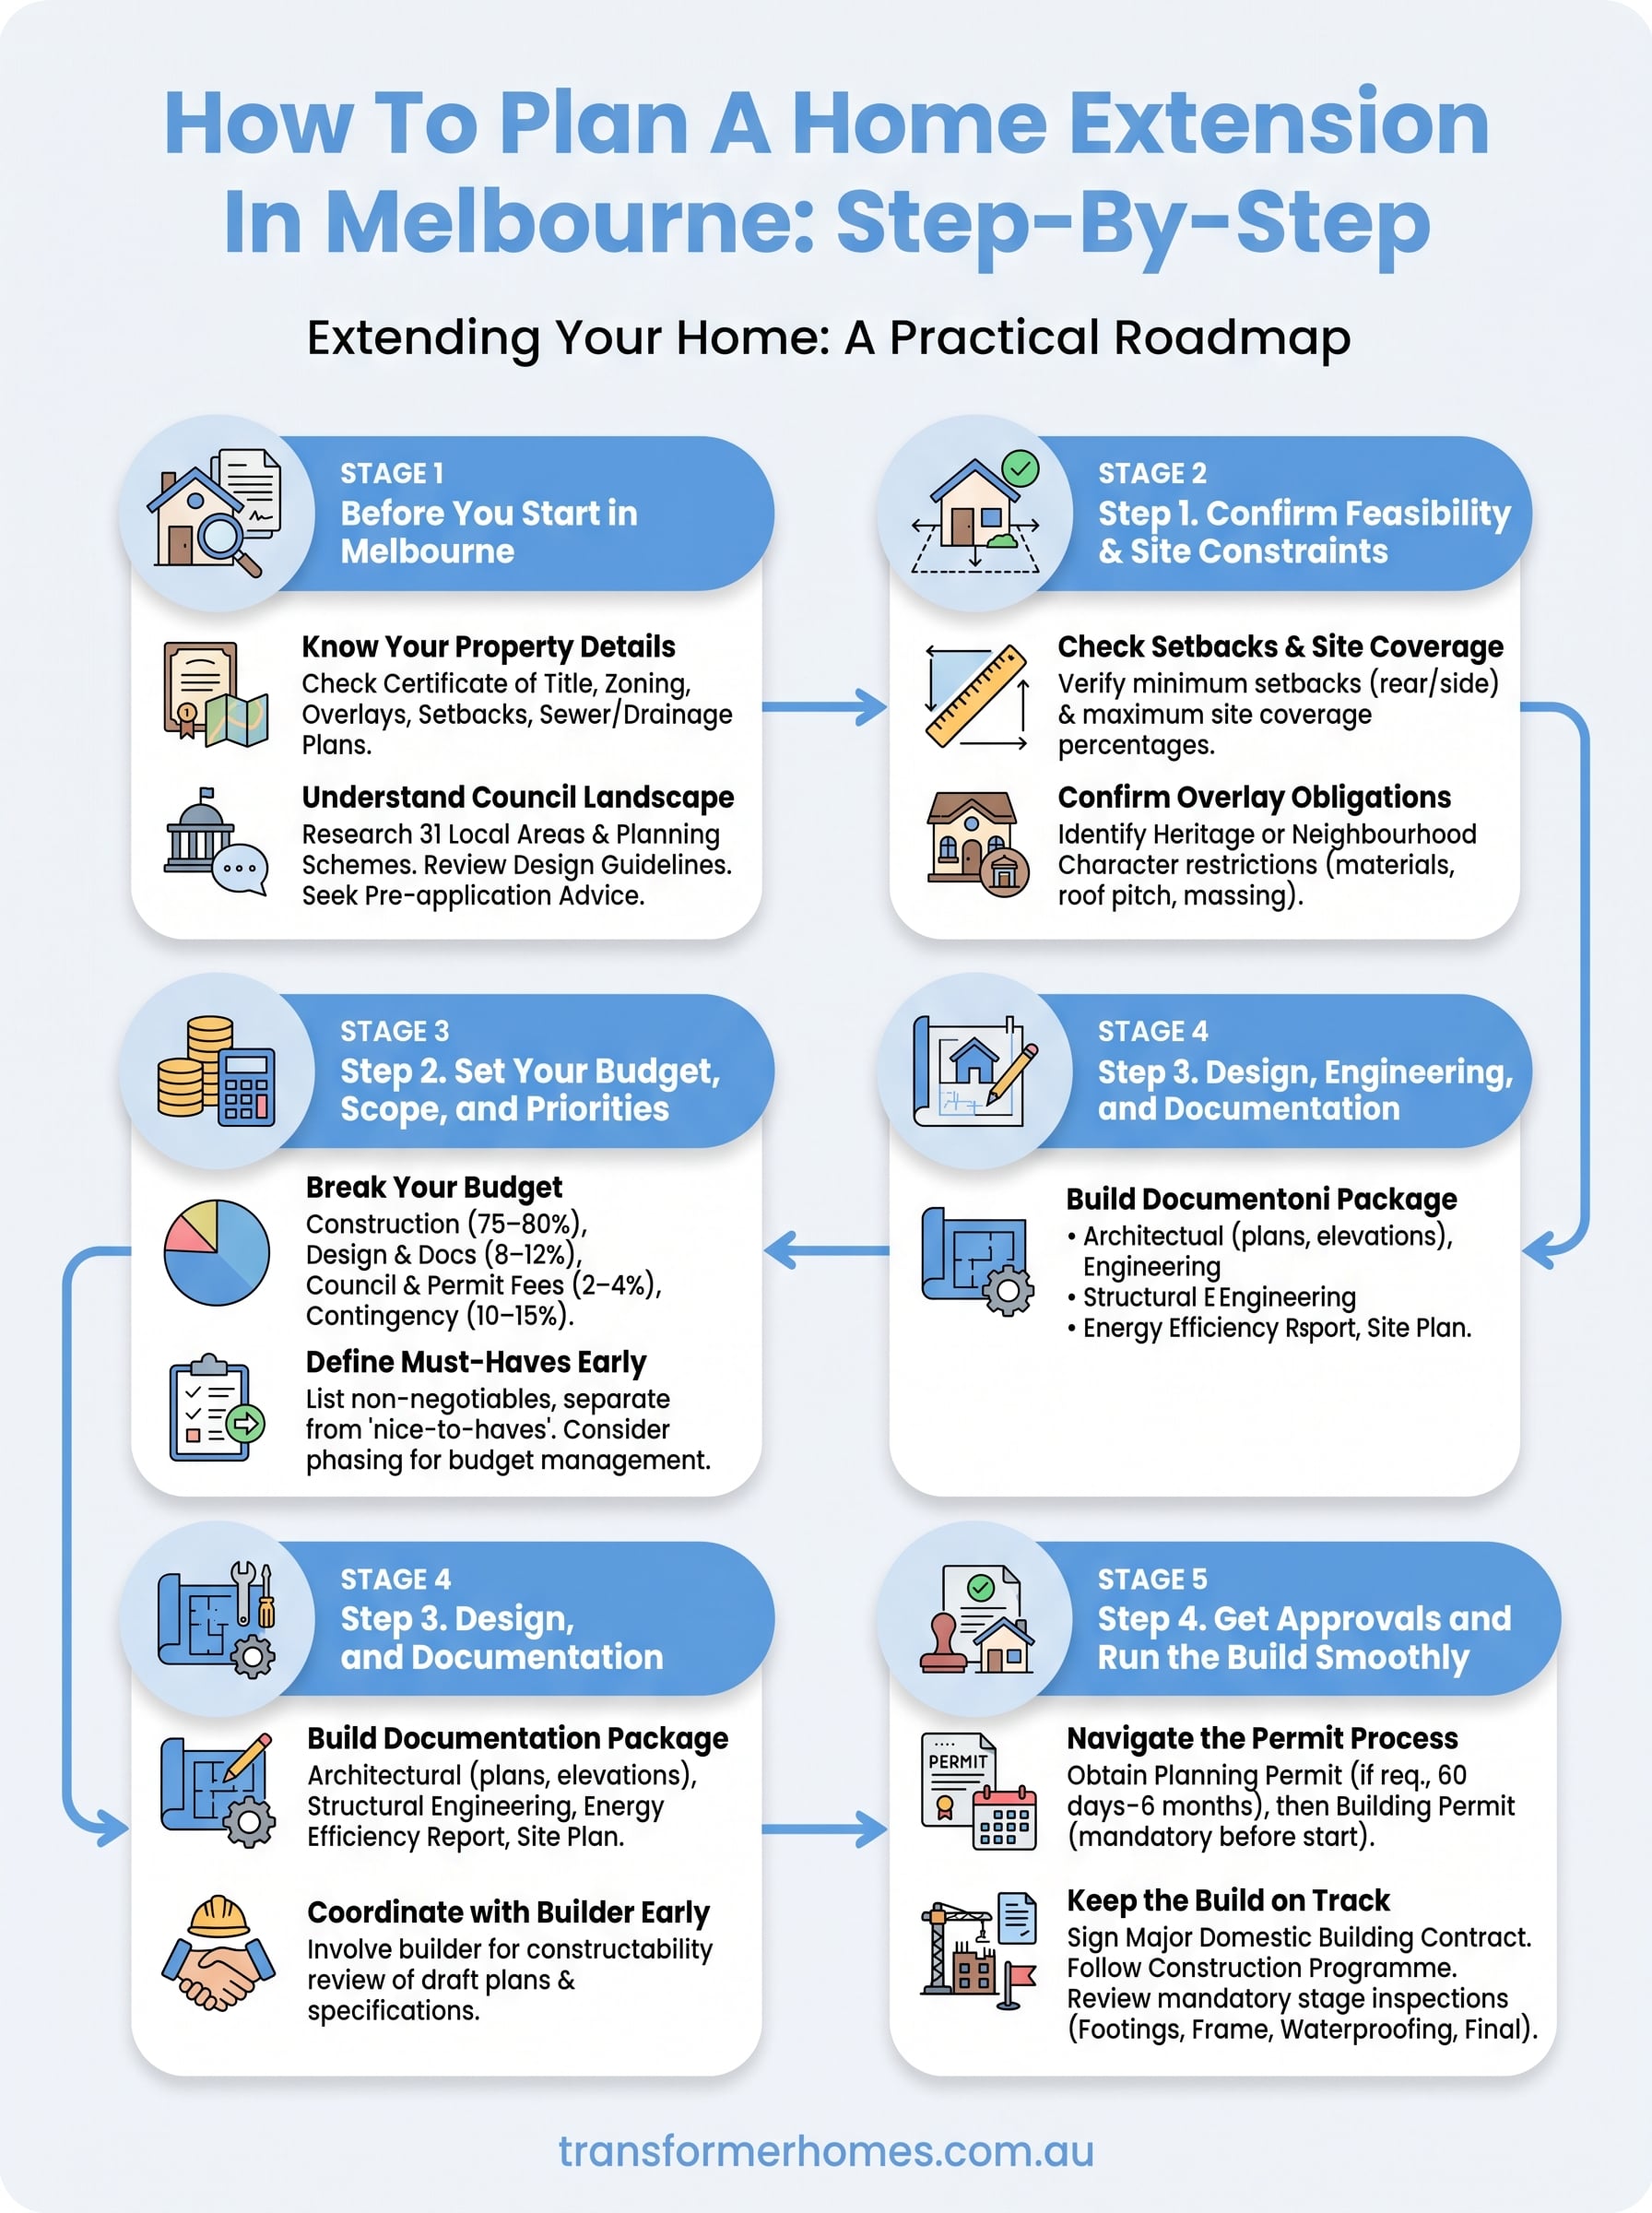
Step 1. Confirm feasibility and site constraints
Before you commit to any design, you need to confirm whether your extension is physically and legally possible on your block. This step is one of the most overlooked parts of how to plan a home extension, yet skipping it leads to wasted design fees and drawn-out approval processes. Pull out your Certificate of Title and cross-check your property’s boundaries and easements against what you’re hoping to build.
Check setbacks and site coverage
Your local planning scheme sets minimum setback distances from boundaries, as well as maximum site coverage percentages. For example, in a General Residential Zone under Victoria’s planning regulations, rear setbacks typically follow a shadow plane calculation that limits how close you can build to your rear boundary. Measure your existing footprint against your block size to calculate how much of your site is already covered before you add anything new.
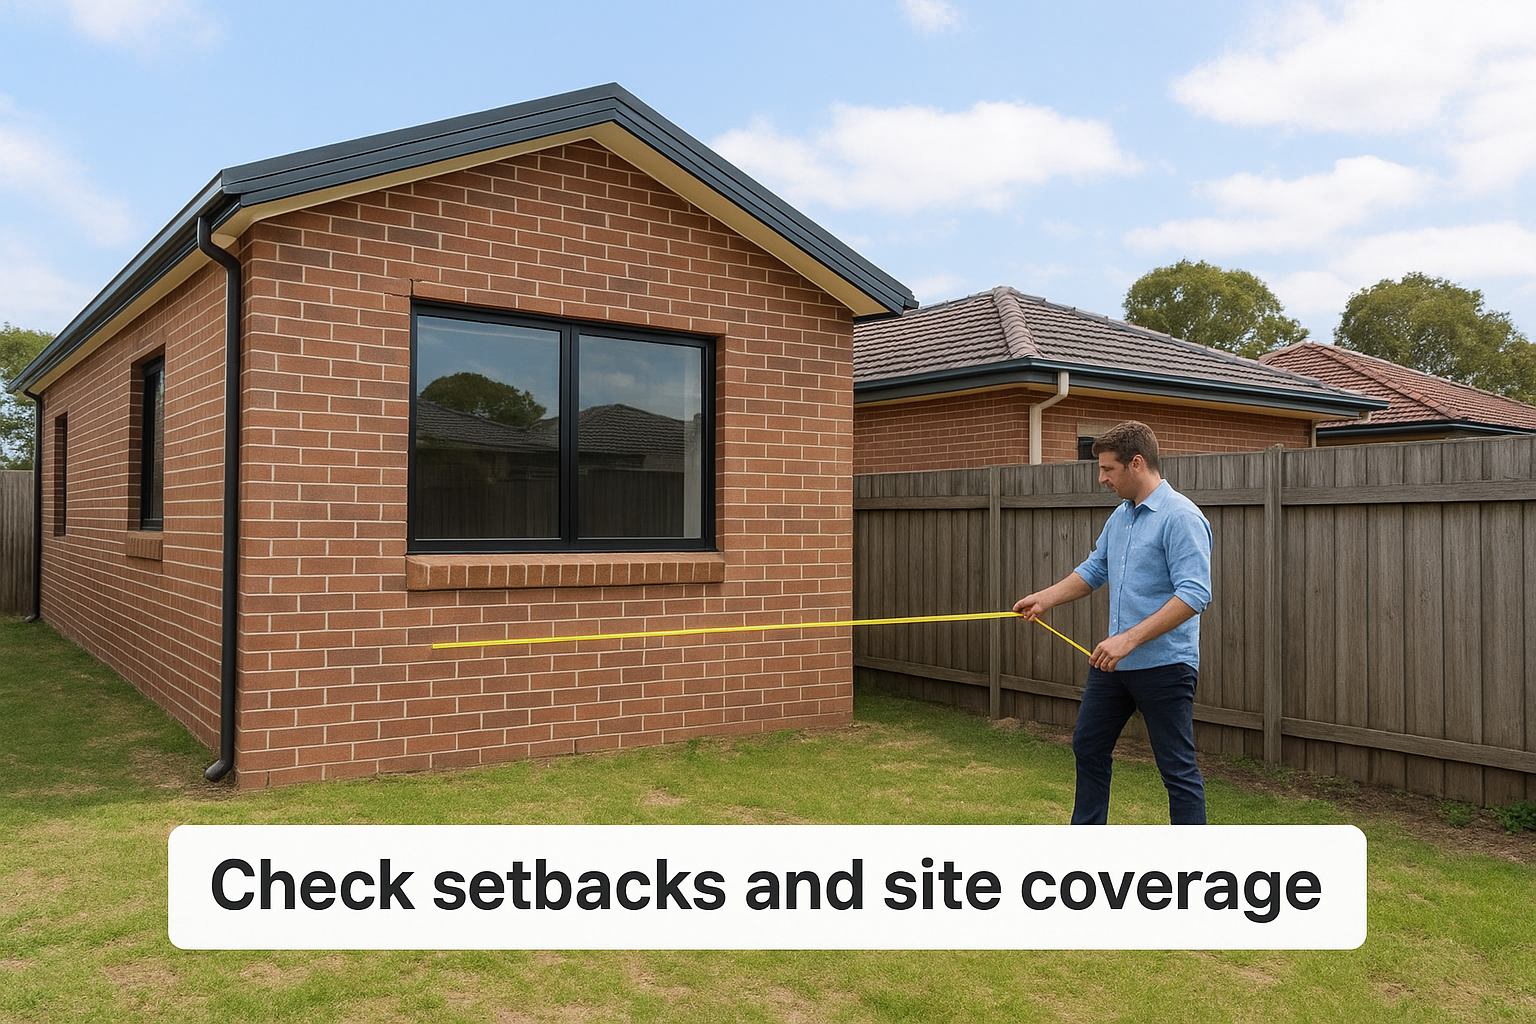
If an easement runs along your rear boundary, you generally cannot build over it without approval from the relevant authority.
Confirm your overlay obligations
Heritage and Neighbourhood Character Overlays can restrict materials, roof pitch, and overall massing of your extension. Check your council’s planning portal to identify which overlays apply to your property. Knowing these constraints upfront lets your designer work within them from the very first sketch, saving you from costly redesigns later. A quick call to your council’s planning department can clarify the specific requirements in as little as ten minutes.
Step 2. Set your budget, scope, and priorities
Once you’ve confirmed feasibility, setting a realistic budget is the next critical move in how to plan a home extension. In Melbourne, rear ground-floor extensions typically cost between $2,500 and $3,500 per square metre for a mid-range finish, while second-storey additions push higher. Getting this figure clear before you brief a designer prevents scope creep and keeps your project grounded in what’s actually achievable.
Break your budget into categories
Split your total budget across construction costs, design and documentation fees, council application fees, and a contingency buffer. A contingency of 10 to 15 per cent is standard on Melbourne builds, given site-specific surprises like unexpected soil conditions or services relocation. Use this breakdown as your working budget template:
| Cost Category | Typical Share of Budget |
|---|---|
| Construction | 75–80% |
| Design and documentation | 8–12% |
| Council and permit fees | 2–4% |
| Contingency | 10–15% |
Define your must-haves early
Listing your non-negotiables before you meet with a builder or designer stops the scope from ballooning. Separate your priorities into what you must have, what you’d like, and what can wait for a future stage. Phasing your extension is a practical strategy if your budget doesn’t stretch to everything at once, and a good builder will design the first stage with the second already in mind.
Locking in your priorities list before design begins gives your designer a clear brief and reduces costly back-and-forth revisions.
Step 3. Design, engineering, and documentation
With feasibility confirmed and your budget set, you’re ready to enter the design phase. This is where how to plan a home extension shifts from preparation into action. Engaging the right professionals, typically a building designer or registered architect, ensures your extension is both functional and approvable before permit costs are committed.
Build your documentation package
Your designer will produce architectural drawings covering floor plans, elevations, and sections. A structural engineer then prepares engineering drawings for footings, beams, and structural connections. These documents form the core of your permit application and must be complete before you submit anything to council.
Your full documentation package typically includes:
- Architectural drawings (floor plans, elevations, sections)
- Structural engineering drawings and specifications
- Energy efficiency report (NatHERS or equivalent)
- Site plan showing setbacks and drainage
Incomplete documentation is the most common cause of permit delays, so invest time to get it right before lodging.
Coordinate with your builder early
Bringing your builder into the design process early prevents costly redesigns down the track. An experienced local builder can review draft plans for constructability issues before your designer finalises anything, saving revision fees and time.
Your builder should also review the specification document, which sets out materials, finishes, and construction methods. Catching mismatches between specs and drawings at this stage keeps variations during the build to a minimum.
Step 4. Get approvals and run the build smoothly
With your documentation package complete, you’re ready to lodge your permit applications. This final stage of how to plan a home extension involves two separate approvals in Victoria: a planning permit (if required) and a building permit, which is always required. Submitting both correctly and on time keeps your build timeline intact.
Navigate the permit process
Planning permits in Melbourne can take anywhere from 60 days to six months depending on your council and whether objections are lodged. Your building permit is issued by a registered building surveyor, either through your council or a private certifier, and must be in place before any construction starts. Using a private building surveyor typically speeds up the process, so ask your builder which path suits your project type.
Lodge your building permit application as soon as your planning permit is granted to avoid lag time between approvals and your construction start date.
Keep the build on track
Once your permits are issued, appoint a builder and sign a Major Domestic Building Contract, which is required by law in Victoria for projects over $10,000. Request a construction programme from your builder at the start so you have a clear timeline with key milestones.
Your building surveyor will complete mandatory stage inspections throughout the project. Make sure you review each stage sign-off, as these inspections cover:
- Footings and slab before concrete is poured
- Frame inspection before lining
- Waterproofing before tiling
- Final inspection before occupancy
Next steps to extend with confidence
Knowing how to plan a home extension gives you a real advantage before you spend a cent on designers or builders. Every step in this guide builds on the last, starting with your property details and constraints, moving through budget and design, and finishing with permits and a well-run build. Skipping any stage creates gaps that cost you time and money down the track, so work through each one in order.
Your next move is to pull your Certificate of Title and check your planning zone and overlays. Armed with that information, you can have a focused first conversation with a builder who knows Melbourne’s Northern and Western suburbs well. That conversation will tell you quickly what’s realistic for your block, your budget, and your timeline. Getting specific early is what separates smooth projects from expensive ones.
If you’re ready to move forward, talk to the team at Transformer Homes about your project today.
